Friday, April 20, 2012

Design by Diana Blog Hop!


Welcome to stop #5 along Diana Fisher's 3-year blog anniversary blog hop!

I was so honored to be one of the ladies Diana asked to be on this hop. I met her through her former sketch blog, Sketchy Thursdays, and on a scrapbook forum, Scrapfreak. I served on her design team at ST for a term and have remained online friends with her since. I absolutely adore Diana, her work, and her sketches (and we're even Starbucks Pumpkin Spice Latte buddies). :)

Diana wants to celebrate her 3-year blog anniversary by giving the anniversary gifts to YOU - the readers! Hop on through the blog hop to find prizes and inspiration along the way. Plus, there's a chance to play along with us! Use the sketch Diana made, link your entry back at her blog, and you could win a $30 shop credit to Scrapbook Circle. You have until Monday, April 30, to complete the hop and link up your sketch challenge entry to be eligible for the hop prizes!

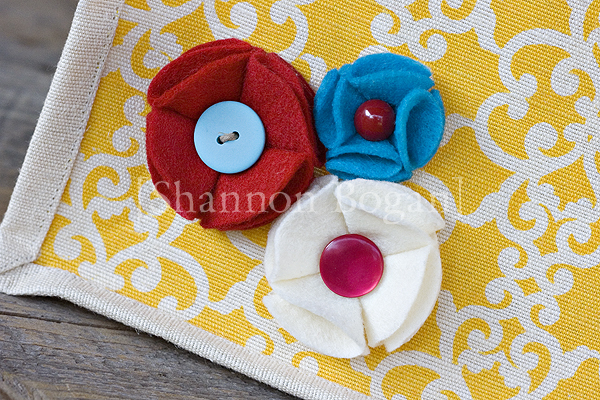
Now, here is the layout I made using her sketch:

Sketch

My Layout
kit: Everyday Life #2, www.weedsandwildflowersdesign.com
alphas: DIY Acrylic Alphabet No.2 by Pattie Knox, www.designerdigitals.com
font: CK Ali's Handwriting
stitching: Terry Maruca Sewing Action v.2, www.scrapbookbytes.com

You have arrived here from...

And you can keep hopping on to...

Before you go though I'd like to offer my own prize. :D Leave a comment on this blog post and you will receive an entry in a drawing for a $10 gift certificate to Diana's etsy shop, Design by Diana. She makes the cutest scrappy and paper crafting goodies so be sure to visit her shop! For a second chance in the drawing, become a follower of my blog and leave a second comment on this blog post saying you did so. I will draw a winner from those names/comments on Monday, April 30, and make an announcement. Make sure you check back to see if you won!

Thanks for stopping by!

Thursday, April 19, 2012

Digi Scrappin'

Just wanted to share some layouts I created today from our Easter holiday this year.

kit: Blossom, www.theshabbyshoppe.com
fonts: Georgia, 2peas Handwritten
template: Scrapping with Liz

kit: Hoppyness, www.digitaldesignessentials.com
font: Pea Roxygirl
lifted from a layout I have pinned here on Pinterest

kit: Hoppyness, www.digitaldesignessentials.com
fonts: Typewriter, Pea Roxygirl
template: Hoppyness, www.digitaldesignessentials.com

And be sure to visit my blog this Saturday as I participate in a blog hop to celebrate Diana Fisher's 3-year blog anniversary! There will be a great sketch, lots of fabulous layouts from the other blogs along the hop, and awesome prizes! Don't miss out!

Thanks for stopping by!

Thursday, April 12, 2012

Front Door Wreath

I've had this wreath lying around that I got on clearance at Michael's a couple years ago for a couple bucks. I've been wanting to make a wreath for my front door but can't decide what I want to do. So I made this simple one to suffice in the meantime. I made 3 layered circle flowers from burlap and fabric with button centers. The B is a chipboard alpha I painted red and distressed. Quick, simple, easy, and done!


Thanks for stopping by!


Tuesday, April 10, 2012

My New Craft Tote

I was going through pics on my laptop and came across these of a project I made last summer. I realized I never shared on my old blog so I figured I would share now. :)

I bought this canvas tote on clearance at Target for just over $2 last summer. It was in the gift wrap section and measures 12"x9"x6". I thought it was super cute and would make a great tote for small craft projects I'm working on (mainly my embroidery I like to work on when Kaleigh is in dance class, waiting in the car line at school, etc.)

So I brought it home but thought it was a tad plain and needed some cute flowers on it.

I've seen lots of flower tutorials online and this is my own quick and easy version I created (although I'm sure I've taken ideas for it from here and there).

1. Cut five circles from felt - cut four the same size and cut one a little smaller.

2. We will use the four larger circles to make the petals. For each larger circle, place a tiny dab of hot glue just outside the center of the circle and fold in half like a taco. The glue will hold it loosely in this shape. (Kaleigh was my hand model for these photos. Excuse her dirty fingers and nails. We were knee-deep in crafting that day!)

3. Fold your *taco* in half.

4. Cut off the point of your folded *taco*.

5. Place a tiny dab of glue inside your folded *taco*. The glue will hold it loosely in this shape.

6. You should have four of these petals.

7. Glue the four petals to the smaller felt circle, spacing them so they touch the other petals on each side while leaving a small hole in the middle.

8. Put a good amount of hot glue in the center and attach a button. Ta da! You have a cute felt flower!

I made three flowers for my bag and hot glued them on. It looks so much cuter now!


Thanks for stopping by!

Wednesday, April 4, 2012

Embroidery Hoop Art

I just wanted to share this embroidery hoop art that I made. I took a piece of linen fabric, drew a bird cage using a washable fabric pen, and then stitched it. I took a chipboard bird, covered with an old book page, and then inked the edges. I hot glued the bird and rosette trim on and then sewed on the buttons. I love how this turned out and will be adding it to my staircase photo wall collage I'm working on.


Thanks for stopping by!